on
Office Christmas Tree: Connectivity Test
Once my order from Ray Wu arrived I was able to continue progress on my office Christmas tree project. Time to connect things and see if I can make some light.
Shopping list
While I ordered the lights themselves from Ray, as I was running a little late in creating my project, I settled for buying the rest of the components from Kjell & Co here in Norway, between this project and the lights at home I think I went to their store in Sandvika 4 or 5 days in a row due to my lack of planning.
For this project my final shopping list contained;
- USB power supply with enough amps to power a Raspberry Pi and the lights
- Cables to cannibalise for “easy” connection to GPIO pins
- USB cable to cannibalise to connect the lights to the power supply
- USB Wifi dongle for WiFi connectivity of the Pi
In addition I already had lying around the house an original Raspberry Pi B with SD card and some WAGO splicing connectors that I was able to use.
Connecting it all together
I’m not going to embarass myself by attempting to draw a diagram but the connection was a simple case of taking one of the Luxorparts cables, cutting it in two, stripping the ends and connecting one of the halves to the Data In line of the pixel string using a WAGO splicer. Then cutting the end off a USB cable, connecting the V+ to the V+ on the pixels with another WAGO connector, then finally connecting the V- to the GND on the pixels and a the remaining half of the Luxorparts cable.
Then I just connected the data line to pin 12 (BCM 18) and the V-/GND line to pin 25.
This might not be pretty but it was good enough given the time constraints I had.
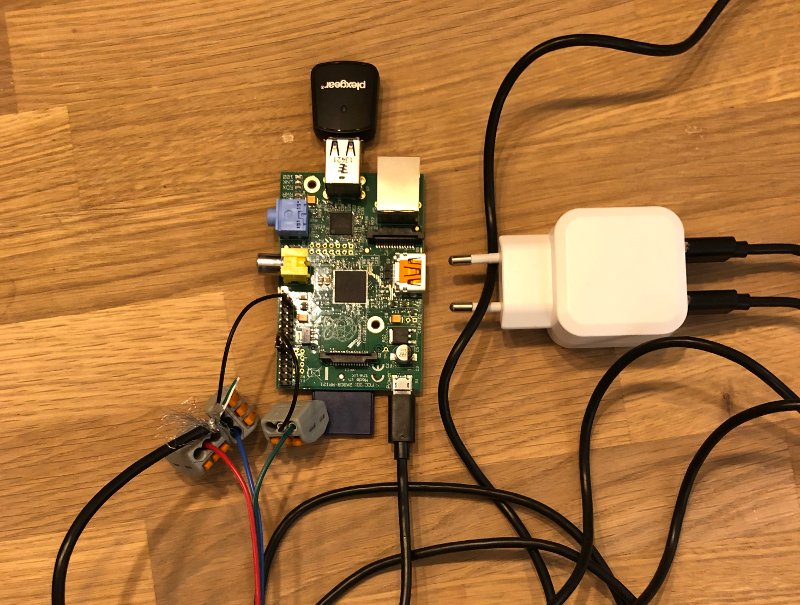 The red, green and blue cable is connected to the string of lights
Installing Falcon Player
Now that the hard part was finished I just had to get sofware onto the Pi that can do something interesting with the lights. While I realise it is a little overkill for this project, to get things up and runnning quickly and share some cognitive load with Christmas lights on the house I decided to put Falcon Player on the Pi.
This wasn’t quite as simple as I had hoped, but mostly due to my own impatience. At exactly the time I was doing this there were no release images available for version 2.5 so the installtion process involved downloading 2.4.2, writing this to an SD card with Etcher then using the online upgrade, to upgrade to the latest version.
I had done this process the day before for the lights on my house on a Raspberry Pi 3 and it took a few minutes. Building on the original Pi took considerably longer and I pulled the power thinking it had frozen, also bricking the install.
After starting again I set up an ssh session so I could watch activity with htop while doing a second attempt. As I was able to see the activity on the second attempt I realised that it was working, it just needed a whole hour to do the upgrade.
After configuring the string via the Falcon Player web ui I was able to blink the lights using the test functionality.
Having confirmed that the technical side of the project was ok, the next post will document my exploration of 3D printing a shape to which I could attach the pixels.